A really great article about renovations and lowest bidders

http://canadianrenovations.com/risks_hiring_low_bidder


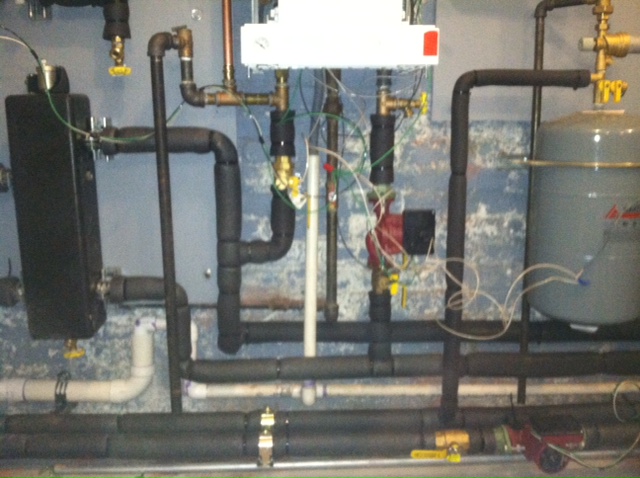
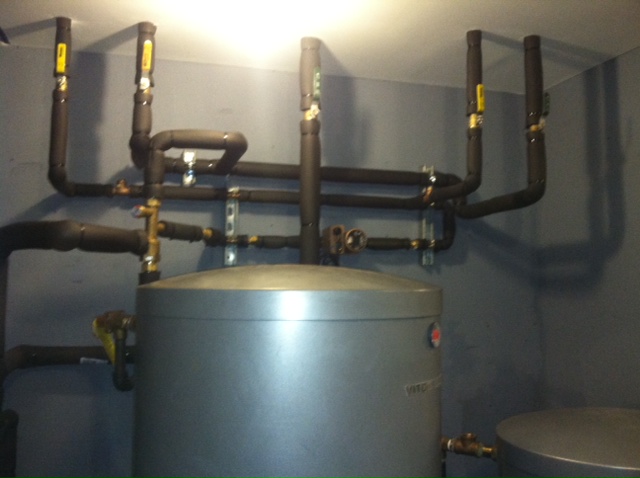
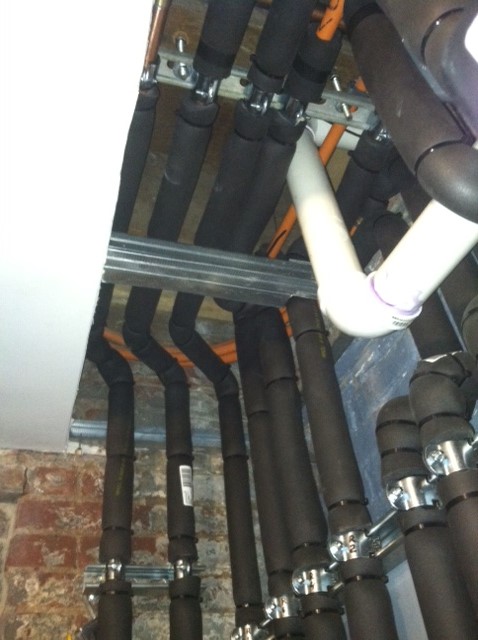
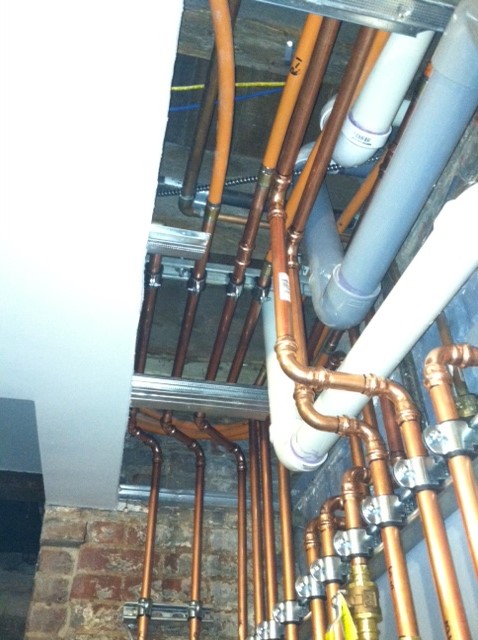
This is a great article about the importance of not cutting corners in a renovation and the woes of going with the lowest bidder. Obviously we especially love the emphasis they put on the HVAC system. 

"HVAC – This is an area that you really need to have a professional design and installation. Poor design or the wrong size system will result in a wide range of temperatures in your home. Utility costs aren’t likely to come down. This is one more area that the low bidder can substitute a “no-name” unit to make money."

Enjoy the article below...

There are Typically 3 Types of Renovation Contractors that Provide the Lowest Bid:

  1. They Don’t have Enough Experience to Properly Bid Your Project
  2. They Know All the Shortcuts on Quality (and you won’t notice them until it is too late).
  3. They Use a Cost Plus Proposal Because it Gives them the Right to Increase the Your Price for Virtually Any Reason

Most homeowners only do a major renovation once in their life.

  • Inexperienced renovation contractors don’t know all the things that are needed to complete a quality project. They almost always underestimate the amount of labor needed to do each task. They are then forced to take shortcuts to “make it work”. This is never good. Often they will ask for more money and if your home is a wreck and you won’t have much choice.
  • Unscrupulous contractors know, that you don’t know how to find their shortcuts. They don’t plan on working for you again so they will take advantage of your inexperience. There shortcuts on quality won’t show up right away but they will eventually.
  • Probably the most surprising low bidder is the one that uses a Cost Plus Proposal to look like the best bid.
  • The Cost Plus Proposal gives the renovation contractor the right to increase the proposal price for virtually any reason. So they can bid low, get the job and then exercise their right and ask for more money.
  • Once the demolition is done your back will be against the wall. Your choice will be to fire them and find someone that is willing to take over your project or pay the “ransom” and be upset about it.

The information on this page is provided to help homeowners avoid hiring a contractor that will frustrate you with poor quality or leave you with a half-finished project.

Why Not Take the Low Bid?That is a fair question. Can’t you hold them to the price? Not very likely.

It is more likely that they will demand more money once they complete the demolition and all you have are studs. If you don’t give in they can walk off the job and disappear especially if you gave them a nice deposit.

If you signed a Cost Plus Proposal you won’t have any leverage because the shrewd contractor can come up with plenty of reasons why they need more money.

It can really be attractive to take the lowest bid on a home renovation project because the “savings” can look substantial. If the bid also fits your budget it can be even more attractive.

Before you sign any proposal consider this information carefully.
 

  1. Some contractors will simply throw out a low bid to hook you. They will then start negotiating. Ethical contractors provide their best price up front and will include all the details on materials and installation methods.
  2. Bids that are 10% or more below other bids can’t be the same job. A 10% profit is a solid profit on a quality job so if their bid is 10% or more below other bids it would mean they are working for free. No one works for free. Substituting lower quality materials and taking shortcuts on installation allow them to still make money at your expense.
  3. Kitchen cabinets can cost $10,000 or high end cabinets can be $50,000. Installation costs will be pretty close. One tactic the low bidder can use is to offer a “private label” cabinet with “all the features of the high end cabinet at a much lower cost”. What they won’t tell you is that they are making money because they are buying these inferior cabinets at a deep discount and charging you a premium price. They may look good for a while but they will start to fall apart. Check out the reputation and warranty of all material and appliance suppliers before you buy. At a minimum, if you can’t find them on line, don’t buy their cabinets.
  4. Low bidders save money because they aren’t insured or are under insured. They take the chance that “nothing bad will happen”. This means that you will be at risk if someone gets hurt on the job.
  5. If you do a Google search there will be some unbelievable stories about unethical contractors that offered a price that was “so good”.

More Opportunities for the Low Bidder to Take Advantage of YouThere are many more ways the low bidder can still make money at your expense. Don’t be fooled, if a bid looks too good to be real, it is.

Windows – Low bidders love bargain windows. They can look good but they won’t fit properly and your heating and cooling costs will go up not down. There is a huge difference between the $99 bargain window and a well-made window. Better windows are custom made for each opening. There is a process to properly install the windows whether they are replacement windows or complete window replacements. If the proper techniques and materials are not used there may be air leaks and water damage caused by the improper installation. Most bargain windows have limited warranties so if something goes wrong you will probably eat the cost to fix it. This is one place that the low bidder can make some easy money at your expense.

Sheetrock and Drywall – Nails pop and seams will begin to show up as soon as the weather changes and then it's too late. Low bidders may use cheap sheetrock from China and that can have some very serious health consequences for your family.

Kitchen Cabinets – As we pointed out above you can spend $10,000 or $50,000 on kitchen cabinets for the same project. Here are some of the typical problems with “knock-offs”: doors will warp or won’t fit flush, drawers fall apart, tracks and hinges come loose.

The biggest issue is in measuring. Shortcuts or inexperienced carpenters won’t take the right measurements. When the cabinets arrive they will need to “make them fit” and this takes time and will result in a mediocre installation. This is another area where the low bidder can make up profits with cheap “knock offs”.

Stone – This is another area where there is a wide range of pricing. Granite and Marble must be measured correctly to create the proper fit. You can’t recut a piece of granite or marble if the measurements are wrong. Bigger seams to make up for errors in measuring look awful. This can be a big investment that ends up looking mediocre.

Framing – Walls have to be plumb or they will cause endless problems with the drywall, moldings, casements and other trim work. The cabinets and trim work won’t be flush with wall or ceiling. The gaps will be almost impossible to fill and it will just look awful.

HVAC – This is an area that you really need to have a professional design and installation. Poor design or the wrong size system will result in a wide range of temperatures in your home. Utility costs aren’t likely to come down. This is one more area that the low bidder can substitute a “no-name” unit to make money.

Plumbing – Cheap plumbing components, especially the ones behind the walls can begin to leak and cause long term damage to floors, walls and ceilings. Leaks can create mold issues and mold is very expensive to remediate and can lead to insurability issues.

Roofing – Most homeowners won’t get up on a roof to inspect it. The low bidder will use this to their advantage. There are almost 30 inspection points that should be checked on each roof installation to ensure a quality installation. Improper or inappropriate installations will create problems with wind, snow and rain. This can create leaks that may result in damage to drywall, cabinets, carpet etc...

Painting – If the drywall is poorly installed it will be almost impossible for the painter to make it look right. The defects will show up in uneven seams, nail pops, uneven surfaces and more. This also means that additional time will be required to prep the walls to try to fix the other issues.

Take the time now to find the perfect company to work with. Committing to a renovation project can be a bit daunting and by doing your homework and completing your screening process BEFORE you sign a contract you’re ensuring that your dream project won’t become a nightmare.
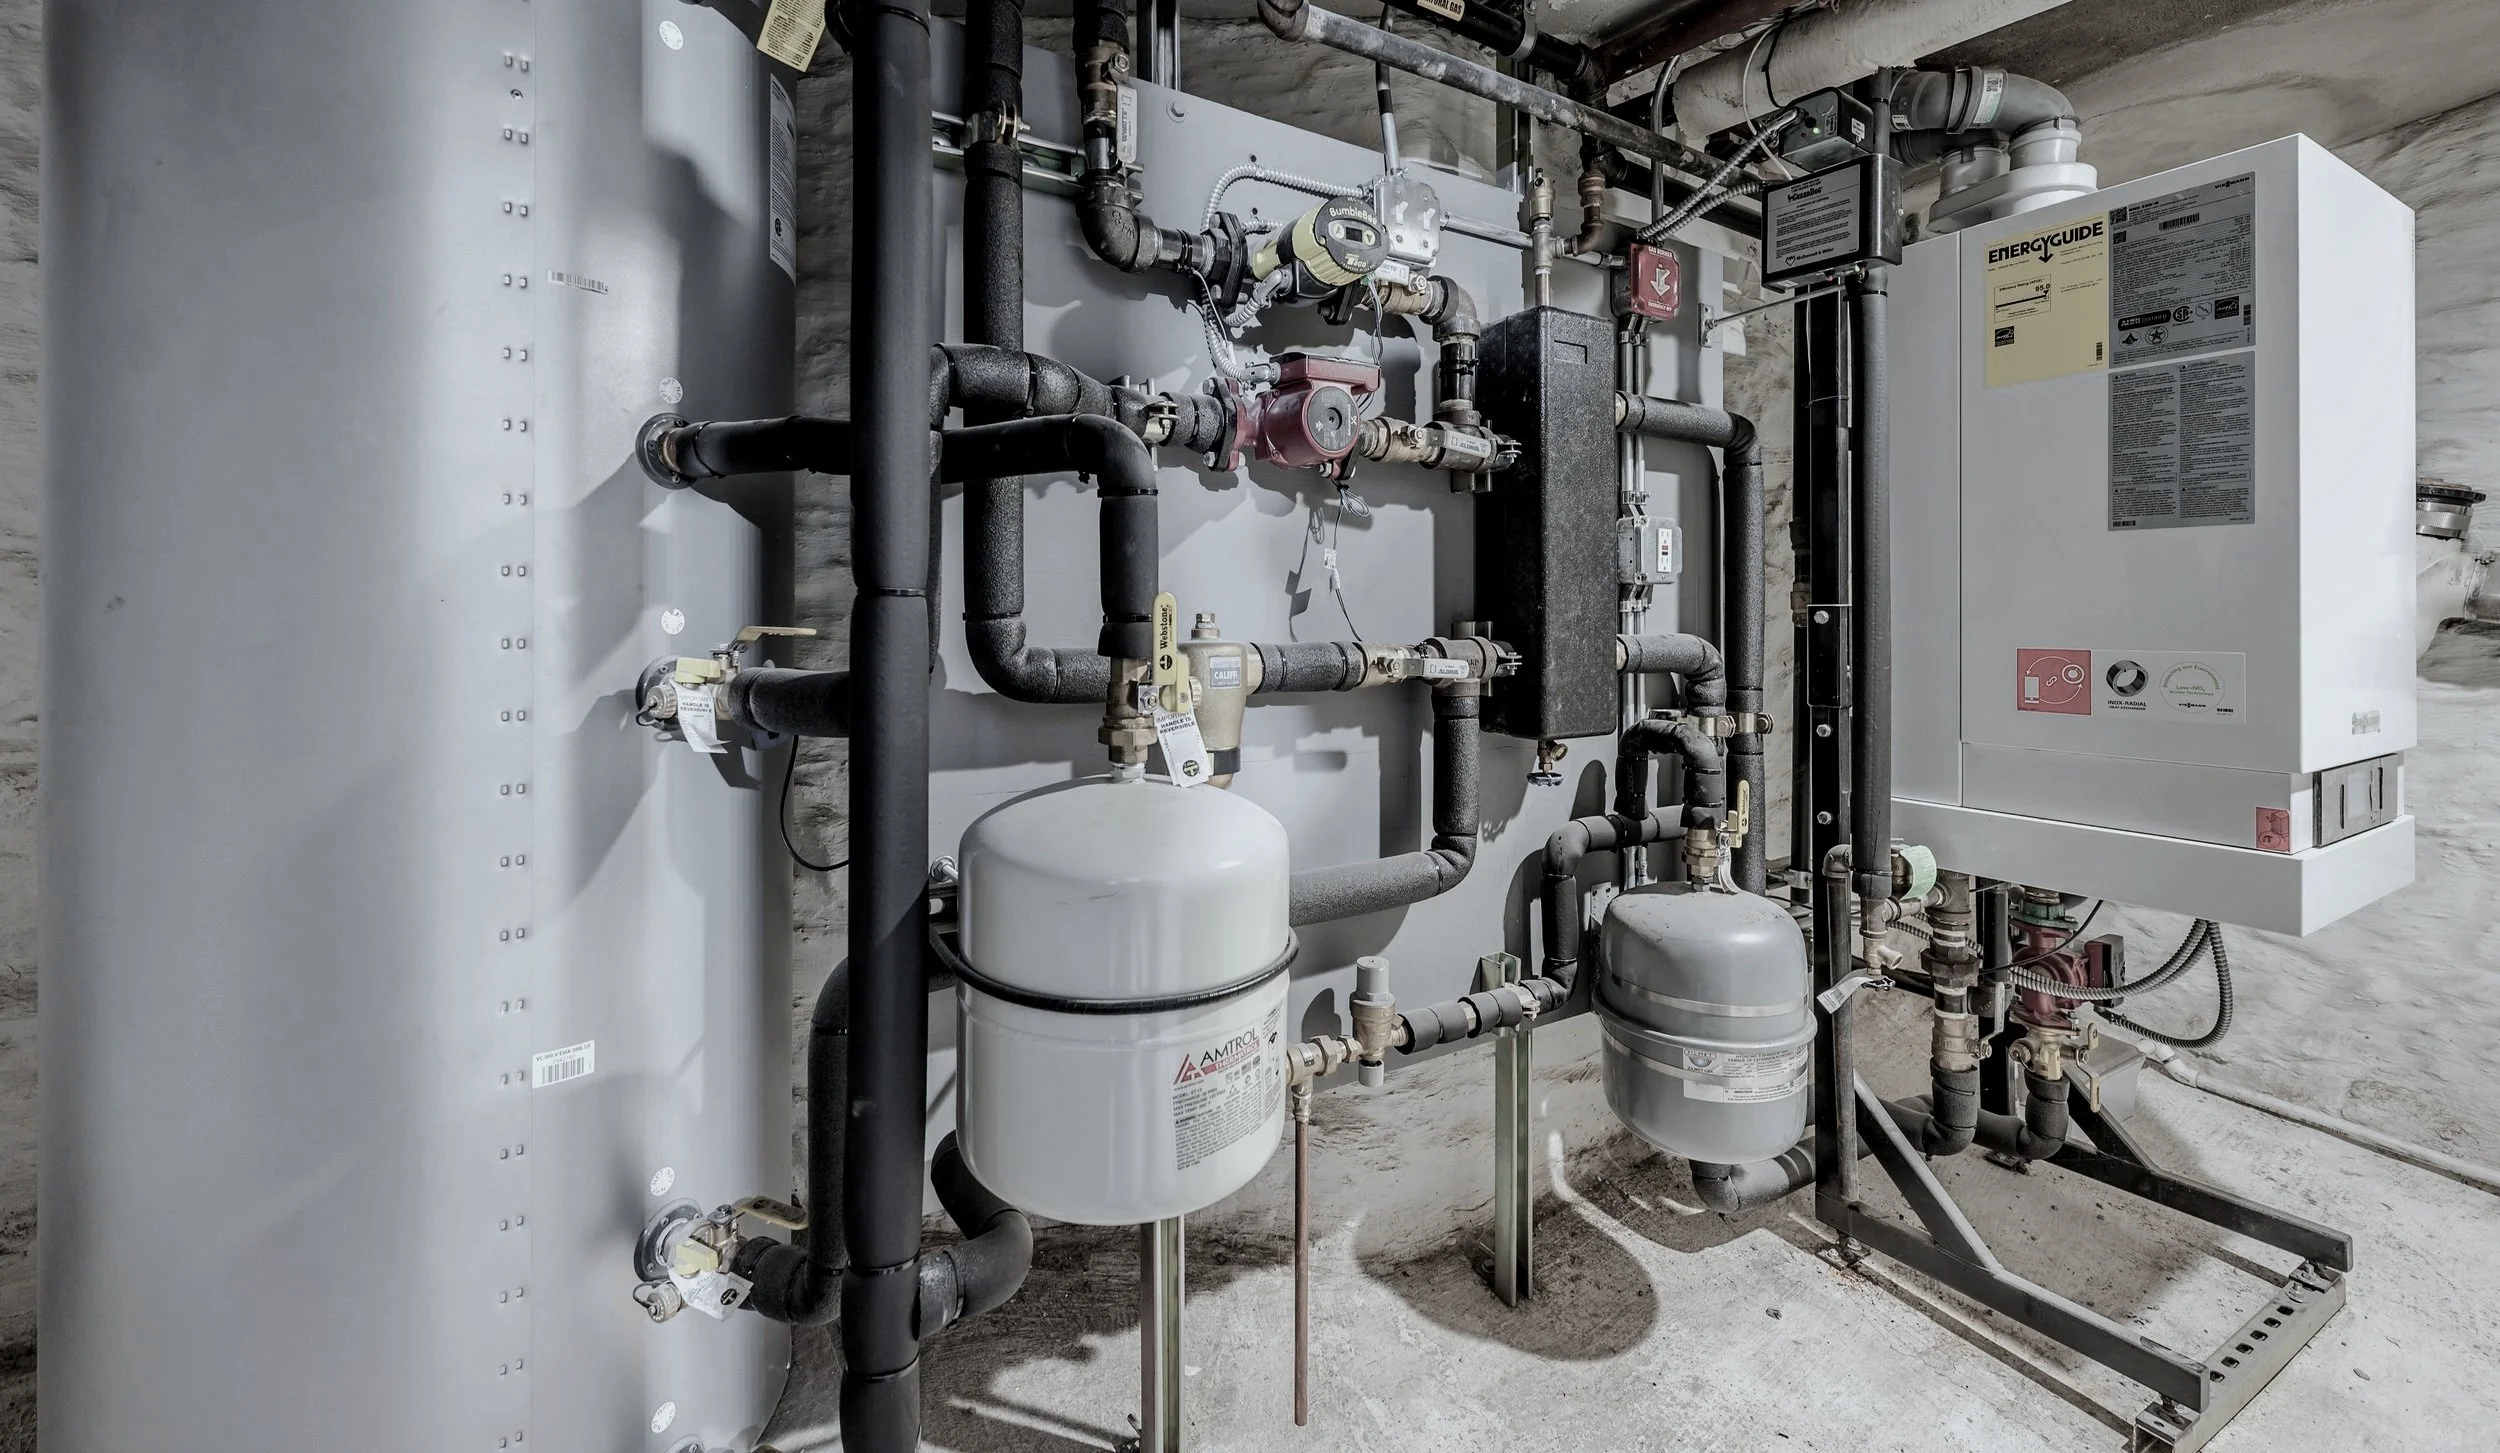
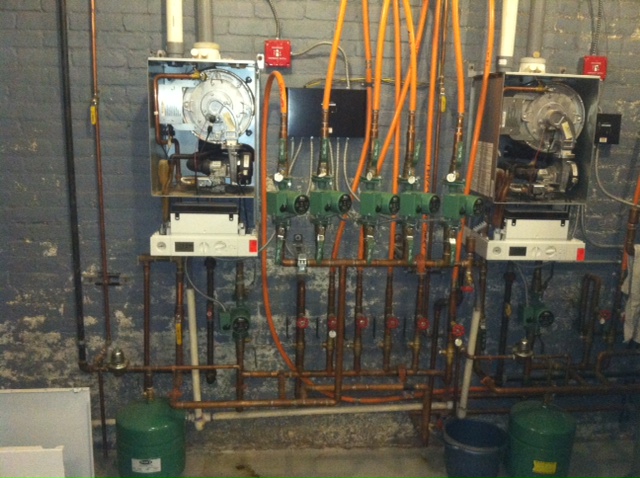
New Consulting Services at Absolute!

Absolute Mechanical is now offering a service to design or consult on the design of your heating system. We can advise on how the system will work, is it being installed correctly, is it being designed correctly, what issues you may find and how to resolve them before you install the system and commit. 

This service is for contractors, customers, architects, engineers, and General contractors who want to make sure their customer or their home gets the best!

Please contact us for more information. 

Steam to Hydronic Conversion

Is it necessary to convert from steam to hydronic to achieve a desired result in your heating system? It depends on what result is desired. That depends on the goal really. 

Typical Goals:
1. Save on fuel bills
2. More comfort and control
3.  Quieter system
4. More modern system (nicer boiler, modern radiators, smaller risers)

While all these goals would be reached by converting to hydronic most of them can also be reached by upgrading to a proper steam system. All other than goal #4 which is a great reason to upgrade to hydronic and usually happens during a gut renovation anyway. 

To convert a steam system from oil to gas with a proper installation of the properly sized steam boiler, header, master vents, TRVs, and thermostat would run a potential client in the area of $20-30k. While convert the entire system to hydronic would only start at $60k. This is without taking into account the construction expenses of cutting and fixing the holes in the floors as well as removing the steam pipes. While a properly designed high efficiency hydronic system does provide more savings than a properly designed steam system the difference is minimal compared to the investment necessary. This is of course unless there is already a gut renovation happening. In that case it's a great time to upgrade. 

Another goal that was not mentioned is zoning. It is common knowledge that the ability to zone will provide exponential savings because there is less of a load on the boiler and it's not working when it doesn't need to work. This was true for standard efficiency systems but is detrimental to the efficiency of a high efficiency system. Therefore it wasn't listed as one of the typical goals. But it should be mentioned. 

Shortly I will provide case studies on our steam systems and hydronic systems. 
 

The importance of a properly designed steam system

As mentioned in the previous article and a constant theme Absolute Mechanical reiterates, it is possible to get great savings and comfort with steam. This is proven in the case study below. 

Property Type: 6 Unit + commercial
Property Size: 7,451 sq ft
Infiltration: Attached on both sides with an extension in the rear. 
Fuel: Gas
Boiler: SlantFin 
System: Steam system with hydronic portion for extension converted from oil to gas
Average Savings: approximately 70%

Fuel Bills Analysis:
Total Oil Bill for 2012 was $9,730 including gas for the building and hot water production. 
Total gas bill including gas for building and hot water production after installation:
10/22/2013 - 11/20/2013  - $343.00
11/20/2013 - 12/20/2013  - $609.00
12/20/2013 - 1/23/2014    - $831.11

We will keep tracking the savings for this installation.

These results were reached all the while with keep 72 degrees inside with no night set backs, no downtime, and now uncomfortable periods. 

A fantastic article about the history of primary and secondary loops

http://www.indoorcomfortmarketing.com/necessity-is-the-mother-of-invention.html

This is a great article that shows the rich history of heating and the drive of innovation.

Necessity is the mother of invention (Primary/Secondary Pumping)
George Carey
Primary/Secondary pumping…It seems to have become the “catch-phrase” of the hydronics industry over the last few years and rightly so. Its applications are virtually endless and the benefits of this piping technique have solved many problems over the years. But where did this piping technique come from and WHY is it so useful?

An engineer from Bell & Gossett named Gil Carlson originally developed this piping technique. This is the same Gil Carlson who promoted the concept of “pumping away” from the point of no pressure change (placing the system circulators on the supply); he developed circuit setters to balance multiple circuits and developed a famous engineering tool known as the B&G “System Syzer”. He was instrumental in developing and promoting engineering principals and piping techniques as the world of hydronic heating developed.

As the story goes, Gil was called out to the field to troubleshoot a recently installed commercial hydronic system that was not working. It was a large garden-style apartment complex. The system was designed to operate as a “mono-flo” heating system. And as you know, a “mono-flo” system relies on one primary circulator to pump hot water around the heating main. Piped off this main are risers that feed the various pieces of radiation. Now remember this is not a two-pipe system where there is a separate supply and return main. With a “mono-flo” system, there is only ONE main and each riser’s supply and return pipe is connected to this single main. When the water is circulated around this main, what is going to cause some of the water to “jump off” and flow into the radiation circuit? That is where the mono-flo fittings come into play. From the outside, a mono-flo fitting looks like an ordinary tee, but on the inside there is a cone-shaped fitting that reduces the opening of the tee. This reduction causes pressure drop as the water flows along the primary main. And it is this pressure drop that causes a portion of the water to move off the main and into the radiation circuit. On the problem job that Gil was called out to troubleshoot, the water was flowing nice and hot along the main, but was NOT flowing up into the radiation circuits. After some investigating, he found out that two different engineering firms were involved in the system design. One was responsible for the boiler room and primary main piping. The other firm was responsible for the distribution piping throughout the buildings.

What happened was the primary main piping was significantly undersized and the distribution and radiation piping was oversized. When you put these two mistakes together in a large mono-flo system, the result is NO-HEAT throughout the complex! After much arguing and “finger-pointing”, Gil decided to try an idea. His thought was to install a small, in-line booster pump on the supply riser of each building. His idea was to turn on the booster pumps every time the main circulator was running. The booster pumps would be able to overcome the pressure drop of their own risers and radiation circuits, thus establishing the needed flow to heat the buildings. One problem that he had to contend with was the problem of installing all these smaller booster pumps in series with the larger primary pump. To overcome this problem, he came up with the idea of installing a piece of piping that was connected from the supply to return riser. The pipe, which he referred to as the “common pipe”, was common to both the riser circuit piping and the primary main piping. When all was said and done, the problems went away, the buildings heated as designed and a new and innovative method of pumping multiple circulators was born. By the way, this all took place back in the early 1950s!

The Simplicity of Primary/Secondary

Primary/Secondary Piping–Click to Enlarge


When two piping circuits are connected, flow in one circuit will cause flow to occur in the other circuit based upon the pressure drop in the piping common to both circuits. This describes exactly how a mono-flo system is supposed to operate. Flow in the primary main will cause some flow to occur in the mono-flo circuit due to the pressure drop of the mono-flo fittings in the piping common to both circuits. What Gil discovered some 50 years ago, was if the pressure drop in the piping common to both circuits was eliminated, flow in one circuit will not necessarily cause flow to occur in the other circuit.

That is the basis for Primary/Secondary Pumping; the pressure drop in the common pipe has to be virtually eliminated. By keeping the pressure drop very low, you have hydraulically isolated one loop from the other. Therefore, each loop’s circulator can operate as if the other circulator does not exist. The benefit of this is you can have different size circulators co-exist without pumping problems. You can isolate flow through the off circuits by simply turning off that particular circuit’s pump. You can prevent heat from traveling into off circuits (boilers, radiation zones, etc…). The spacing of the supply and return tees for each secondary circuit is critical. By keeping the tees close together (maximum 3-4 pipe diameters apart), the pressure drop between the tees is negligible.
Therefore, as the primary pump is circulating water along the main, the water will not flow through the secondary circuit if its circulator is off. You have successfully isolated one circuit from the other.

Law of the TEE

Gil use to say that to fully understand primary/secondary pumping, you had to understand the concept of “the law of the tee”. What he was referring to is what happens in the common piping. The flow rate and the direction of the flow rate that occurs in the common pipe needs to be discussed. Because we have hydraulically isolated one circuit from the other, we can have different flow rates occurring in each circuit. These different flow rates will meet in the common piping. What occurs there can be very interesting. The flow in the primary piping can be greater than the flow in the secondary circuit, the flow rates can be equal and the secondary flow rate may be greater than the primary. What is the significance of all this? Well, with different flow rates coming together in this “common pipe”, mixing of water temperatures is going to occur. And depending upon the flow rates of the primary circuit versus the secondary flow rate, you can mix down supply water temperatures that are going to the secondary circuit. You can elevate the return water’s temperature going back to the primary main. The possibilities are endless and that is one of the reasons why a system designed with primary/secondary pumping can achieve what other more traditional systems can not.

Fast forward to today’s modern hydronic heating systems. Multiple boilers, multiple water temperatures, different types of heating terminal units in the same heating system (fan coils, baseboard, panel radiators and radiant heating). All of these applications can and do incorporate some form of primary/secondary pumping. To keep up with these modern systems, a few manufacturers have introduced a modern primary/secondary arrangement called a “Low loss Header”. This new device simplifies the P/S piping circuit and also eliminates a few other necessary components. They provide air separation, dirt collection and most importantly hydraulic separation from the boiler circuit to the distribution circuit. ICM

If you have any questions or comments, e-mail me at gcarey@fiainc.com or call me at FIA. 1-800-423-7187 or follow me on Twitter at @Ask_Gcarey

Explanation of an installation correction

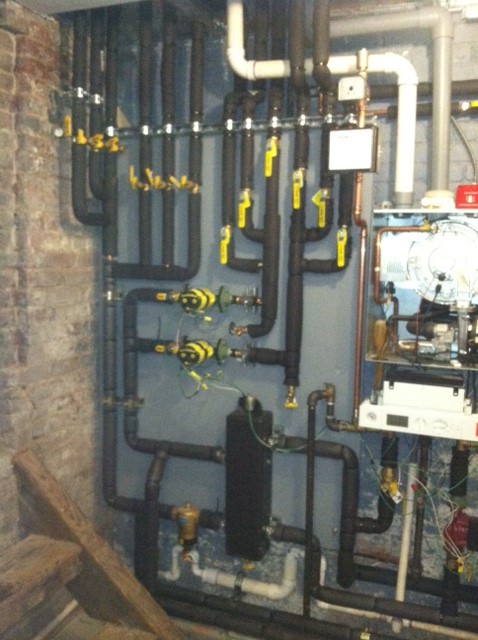
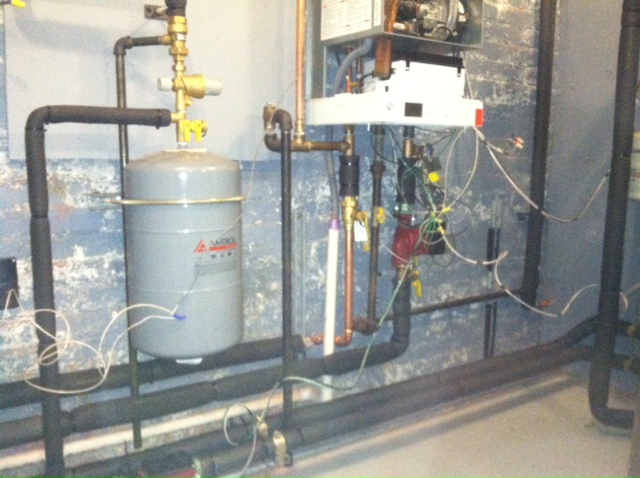
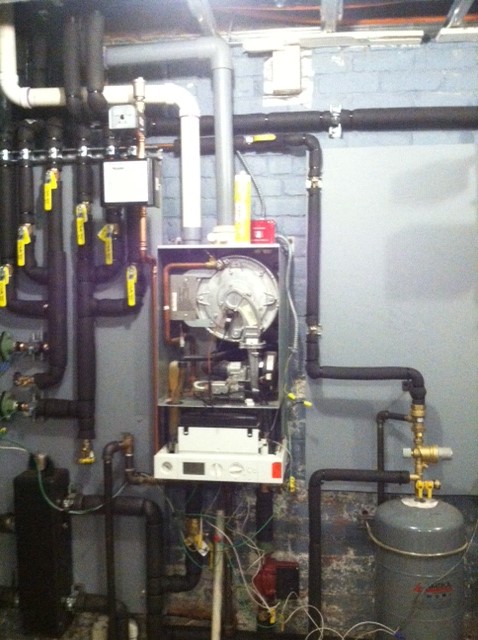
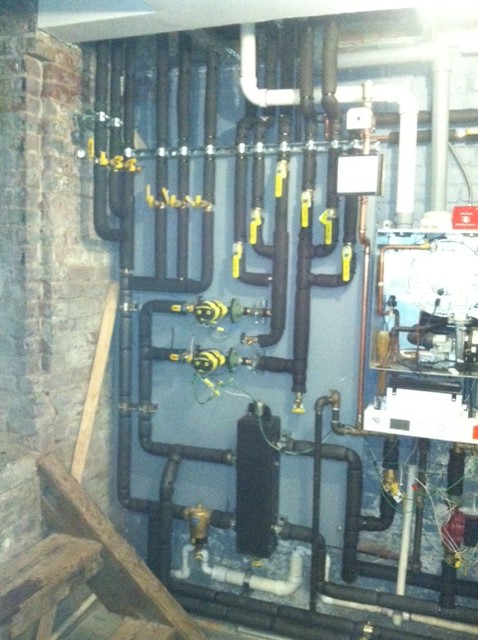
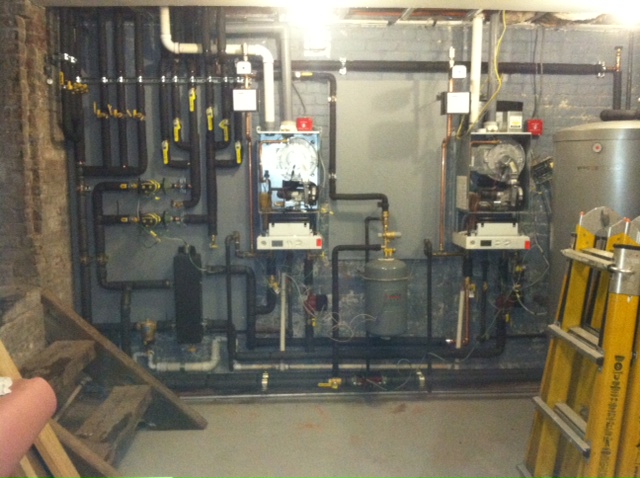
Here is an explanation of a recent correction of an existing installation. The owner called us because the system was showing a fault and the heat was poor in both the owners and tenant units. 

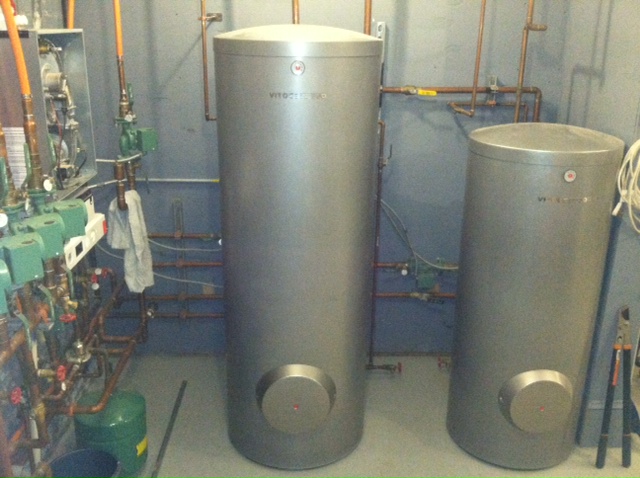
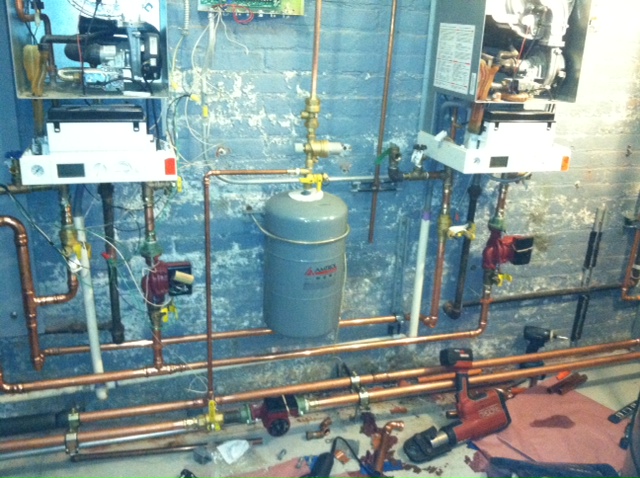
There were two Viessmann 100W boilers installed. One for landlord and one for the tenant. The tenant's boiler was over sized. The landlord's boiler had 5 zones and was short cycling because the boiler was over sized for each zone. We removed the zones and piped the system for continuous flow and modulation of the temperature. 

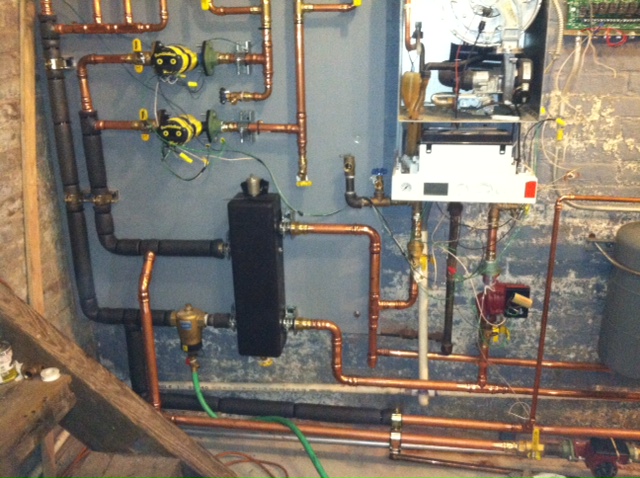
Distribution piping was done with Pex. Pex should not be used in distribution system. While we couldn't change the pex that was inside the walls, we removed the pex in the basement and used rigid copper piping.

The original Plumber did not filed paperwork with DOB and did not pass plumbing inspection. 

Exhaust and fresh air intake piping was undersized and exceed maximum allowed length. Exhaust piping had reversed pitch, leading to condensate accumulation and further restriction of exhaust. Because of these conditions boilers were de-rated and could not output necessary heat to heat the house. We fixed the reversed pitch to remove the condensate accumulation. 

Outdoor sensor was not installed and boiler did not operate with outdoor reset as it was intended to work. We installed outdoor reset and set the system to work as intended. One boiler now services the entire house while the second boiler is used for peak load on very cold days. 

Condensing boilers produce acidic condensate during operation and this condensate must be neutralized. In this installation the acid neutralizer was missing. This is not only bad for the piping, it is also a code violation. Acid neutralizer was installed. 

Indirect fired domestic hot water heaters were installed without mixing valve. Which can lead to uncontrolled and excessive domestic hot water temperature. Also it is code violation. The domestic hot water was repiped to use only one tank for the whole house with a mixing valve and domestic hot water priority. 

Domestic hot water circulator was not installed. Water in hot water pipes cooled down when not used and cold water is discharged from hot water faucets before hot water comes out. A lot of water and time is wasted. Circulator eliminates this problem. This was installed. We installed a smart recirculating pump that remembers the usage and ensures that hot water is ready for use when needed. 

Distribution and near boiler piping was not insulated. We insulated the new rigid pipe. 

There was no hydrolic separation between boiler and heating loops. We installed the system properly with all necessary loops.

No water treatment had been done. We did a system cleaning to remove rust from the system and introduced a rust inhibitor. 

Your Home's Efficiency - Where to Improve Your Homes Energy Efficiency

Your Home's Efficiency

Where to Improve Your Home's Energy Efficiency

5 Ways Your Home Loses Heat

Whether it's summer or winter, energy moves through the walls, roof and cracks of your home. Either cool air conditioned air is lost to the outside during the summer or cold winter air is finding its way into your home during the winter.

Where does a home lose heat energy? Well you can generally categorize it into five areas:
• Ceilings
• Walls
• Floors and Below Grade Space
• Windows and Doors
• Infiltration (air leakage)

No, these are not all the same in terms of their contribution to heat loss. Heat is lost to infiltration and air loss by over 3 times the amount it is lost due to ceilings. These categories generally stack up this way in terms of % heat loss in a home:
• Infiltration / Air Leakage: 35%
• Windows and Doors: 18%-20%
• Floors and Below Grade Space: 15%-18%
• Walls: 12%-14%
• Ceilings: 10%

Hmmm... If you were to get ready for winter your inclination would be to buy insulation wouldn't it? Well it's not the best investment (although always a good thing). Reducing your air leaks around plumbing vents, wall electrical outlets and switches, recessed lights exposed to the attic, attic stairs, vertical plumbing stacks open in the basement and other culprits all allow heated air to be drawn from your home and escape out the roof or other openings.
Bottom Line?
Focus on buttoning up your home to air infiltration and leakage first including windows and doors, then focus on investing on insulation. Also, considering insulating the attic first. Although less heat is lost there than the walls, it is much less expensive to insulate the attic than the walls.


Do It Yourself Home Energy Audit
Here is a great source of information on doing an energy audit on your home and finding ways to improve the energy efficiency of your house. This comprehensive checklist provides you a way to evaluate your home and identify and prioritize potential energy efficiency upgrades.

Billing Terms

  • BTU: British Thermal Unit: One BTU is the amount of heat required to raise the temperature of one pound of water one degree Fahrenheit. A more practical definition would be: how much gas an appliance will use to produce heat or cooling. As a result, gas appliances are sized by a BTU rating. 100,000 BTU's equal 1 therm. For example, a 400,000 BTU heater, when in use, would use 4 therms of gas per hour. A 30,000 BTU range would use .3 therms per hour of use.
  • CCF: Hundred of Cubic Feet: Method used for gas measurement. The quantity of gas at a temperature of sixty degrees Fahrenheit and a pressure of 14.73 pounds per square inch makes up one cubic foot.
  • Billing Factor: An adjuster used to convert CCF into therms. It adjusts the amount of gas used to reflect the heat value of the gas at a given altitude. The heating value can vary from month to month; therefore, the billing factor is not always the same.
  • Therm: A therm is approximately 100,000 BTUs. It is a standard unit of measurement. CCFs are converted to therms for purposes of billing.

Natural Gas Conversions

  • 1 cubic foot = 1050 Btu
  • Therm = 100,000 Btu
  • Ccf = 100 cubic foot, or 1 therm
  • Mcf = 1000 cubic feet = 10.20 therms
  • MMcf = 1 million cubic feet
  • Bcf = 1 billion cubic feet
  • Decatherm (Dth) = 10 therms = 1 million Btu
  • Mmbtu = 1 million btu = 10 therms

About gas rates and how bills are calculatedNatural gas rates are made up of two primary charges:

  • Gas delivery service, which The Gas Company provides - the "delivery" (or "transmission") charge; and,
  • The cost of the natural gas itself -- which is reflected in the "procurement" charge.

Many people believe that The Gas Company produces natural gas, but we don't. For our residential and smaller business customers, we buy natural gas from producers and marketers at the best possible prices on the open market.

The wholesale gas prices we pay are based on market supply and demand. They're not marked up by The Gas Company, and are shown on your monthly bill as the "commodity charge."

The Gas Company's delivery service charge covers the costs of transporting natural gas through our pipeline system. It is approved annually by the Public Utilities Commission and is not impacted by the price of natural gas.

Meanwhile in the land of new construction...

Absolute Mechanical re-installs systems in many "new" buildings where the original contractor was not exactly qualified to work on heavy machinery. We often see some crazy things like entire systems missing half of their required equipment to work properly, apartments installed above garages with no insulation to keep out the cold, 150,000 btu boilers installed for 500 square foot high insulated apartments. 

However, what we saw last week probably wins the award for "wtf". 

In 2010, we repaired a high efficiency boiler installation for one apartment in a for a fairly new building, approximately 5 years old at that time. A few weeks ago another tenant called us to fix their boiler as well, they had just moved in and were having problems with the heating. A few days after that we were called because they had no gas to their stove, but the boiler was working fine. This was outside our scope but we said we would think about what it could be, best to call the utility company. The next morning our customer from 2010 contacted us saying that his boiler wasn't working, perhaps it needed maintenance. When we came to take a look it turned out that his boiler was connected to their gas meter! Which had been locked by the utility. This happens fairly often when the apartments are recently bought, a clerical issue with the utilities. 

This means that the boiler of one apartment is hooked up to the gas meter of another apartment. So for over 5 years everyone has been paying someone else's heating bills. 

"7 biggest mistakes made when hiring a contractor" by Keith Saunders

"7 Biggest Mistakes People Make when Hiring a Contractor And How To Avoid Them" by Keith Saunders

Please read this section carefully. It is very important to pick the right contractor for your job. Just because a contractor has a license or an attractive price does not mean they are qualified to work on your house.

Mistake #1 - Picking your contractor based on price

The old adage is really true. “You get what you pay for.” This is especially true in the contracting business. If you want good contracting you should decide to deal with a contractor because of the overall value you receive, NOT because they are the lowest priced.
Here’s why...

Value = Quality + Service + Price

It is impossible for any company in any industry to offer the cheapest price, have the highest quality, and provide the best service all at the same time. You can get high quality and super service, but you can’t get both and still get the lowest price. Just like in your business, you hire the best people and buy the highest quality products -- consequently, you have to charge more for your services. Total Value is all three. Quality, Service, and Price!

The 3 most common problems YOU WILL have when you pick a contractor who only offers the lowest price:

1) The first problem is that dirt cheap contractors don’t usually stand behind their work if there is a mistake. Sure, other contractors might do your job for a little less money, but how will they treat you when there is a mistake with your job? To give the cheapest price, they usually have low-wage, inexperienced employees that have not been adequately trained.
They also cut corners by using cheaper and lower quality materials to give that low price. The end result is that you get what you pay for. And the little bit of money you saved ends up costing you more in the long run! Believe me, this is a little saying we tell our customers: “The good feeling of a cheap
price is long gone before the stench of poor quality is ever used up.”

2) The second problem with a contractor who offers the lowest price is that they tend to also offer the lowest quality. Your furnace and/or air conditioner is the biggest appliance in your home. And, one of the best investments you can make in your home if done properly. Plainly said, “Shoddy or low quality contracting because of cheap price costs you money.” No amount of savings is worth this. You’ve worked too hard and spent too much money on your home. Why throw it away for the few pennies you save on a contractor?

3) And the third reason why picking the cheapest contractor is a problem is that you might get charged extra for things other contractors normally include in their quote in the first place. You’ll be charged extra for such things as filters, thermostats, overtime due to bad estimates. Cheap contractors nickel and dime you to death. What seemed like a good price actually ends up costing you more in the end. This is just a tactic cheap contractors use to get in the door. To avoid buying on price alone, we suggest you choose two or three contractors and rank them in the order that is important to you such as Quality first, Service second, and Price last.

Mistake #2 -- You Think All Contractors Are The Same.

Every contractor is different. No two contractors are really the same. Every contractor has different equipment and different employees who know how to do certain kinds of jobs well. Every company has a different number of employees, each with different abilities.

Contracting is art and craftsmanship combined. Most people who hire contractors don’t truly understand that despite all the technological advances, contractors still use the same quality work habits as twenty years ago.

Contrary to what a lot of people think, heating and cooling is not just banging on the furnace, changing filters or recharging air conditioners. It takes craftsmanship to turn out quality work. Contractors have to diagnose, measure and perform complicated calculations before they can start a job.

Communication is the key to picking the best contractor for YOU.
• Ask what type of work they do.
• Ask what their average turnaround time is.
• Ask if they work weekends.
• Ask any other questions that are unique to your needs.

This will help you decide whether they are the best contractor for YOU!

After you ask your questions, it will become pretty obvious which company you should choose. The company that wants your business will prove to you they are the best contractor to do your work. Take your time to decide which contractor you would like to use -- but when you decide, you must be loyal to them (See Mistake #3).

Mistake #3 -- You Always Have Three or More Contractors  Competing With Each Other For Your Work. 

You may think this is a good way to do business. And it is to some extent. But here is why it usually isn’t a good way to deal with contractors.

A good contractor has enough loyal customers that they don’t have to deal with price shoppers. Once you find a good contractor, you must be loyal to them. If you flip-flop from contractor-to-contractor, a good shop won’t be too motivated to keep YOU as a customer.

Price is important. But price should not be more important than good quality and good service. This is what people typically like to do. They try to get everyone fighting for the same piece of pie. This might be an OK short term strategy because you save a few bucks. But, when you need a favor, or super fast service -- not one of these companies will instantly bend over backwards to help you.
(And if you have been a price shopper in the past, they will probably charge you more!)

Every contractor expects to bend over backwards for their loyal customers now and again. He or she might have to work all night or on a weekend, to do a super rush job, or pull off a miracle. Provided the customer is loyal, the contractor will do all he can to help you meet your needs.

All good contractors will be loyal to you if YOU are loyal to them. Keep loyalty in mind when you pick your contractor.

Mistake #4 -- You Think Having The Right Equipment Is All A Contractor Needs To Do Your Job! 

Many contractor’s own great equipment, but that doesn’t mean they know how to use it. You can have the “latest, greatest technological wonder gizmo”, but if you don’t know how to use it properly, you are better off not even picking the darn thing up.
Compare this to using all of the complicated controls on your VCR.

Studies show that half the people who own a VCR don’t even know how to set the clock, let alone use its advanced features. The same thing happens in the contracting industry.

Many contractors have tools have a lot of bells and whistles, but if he’s a technician who doesn’t know how to use the new features, you might as well go to a company that has old equipment.

Make sure the technician is trained by the factory or another competent company. This ensures your work will get done right the first time. And on time!

Mistake #5 -- You Don’t Give Your Contractor Enough Time To Complete Your Job Properly! 

Mistakes happen when you rush!

When you’re in a hurry, you may forget to tell your contractor certain instructions. Or you might make a mistake in judgement or purchase decision because you were concentrating on getting it done, instead of getting it done right.

Schedule. Schedule. Schedule.
Before you work on your contracting project, talk with your contractor. Get your contractor involved from the beginning because there might be a more efficient way to finish your project on time that you don’t know about.  
You can save time, money and headaches from the very beginning by communicating with your contractor!

Why do most people do the opposite of this and wait until the last minute to talk to the contractor? Because everyone takes the contractor for granted. Everyone thinks the contractor can easily take care of his or her work. Most everyone thinks the contractor is sitting around waiting for his or her job to come through the door. This isn’t the case.

You should think of your contractor as your “project partner”.

Consult with your contractor. Let them know in advance what you want installed, or fixed. Ask them if there are any tips they can give you to make your job go smoother.

You are not the only customer your contractor has. When they walk in the door and you’re saying you need it now, acontractor can’t always help you. YOU need to work together.

Mistake #6 -- You Pick Contractors Who Don’t Guarantee Their Work. 

All reputable contractors guarantee their work automatically.

This means if they make a mistake on your job, they will re-do or fix your job at no charge.
Unfortunately, there are unethical contractors who won’t do this. Instead, they won’t make good on your work and may not take any responsibility for their mistakes.
An unethical contractor may hold your work hostage. Or may say they will fix your job, but pin the problem on you and tack on an extra charge. There are about a hundred other things a not-so-good contractor may do to you.

The best thing you can do is pick a contractor who unconditionally guarantees their work. If it’s not done right and it’s their mistake, they will do it again or fix it.

Mistake #7 -- You Don’t Ask For References. 

This is probably the easiest way you can avoid any problems with a contractor. ALL good reputable contractors will eagerly give you references.

Ask your contractor to give you at least three names of people who they have done business with. And also ask them how long they have worked with this customer.

Also ask them what type of job they did for those references.

Try and get the names of customers who had similar things done that you need done.

This is the easiest way you can pick the right contractor for YOU!

Boiler Installation Requirements - Department of Buildings NYC

Boiler Installation Basic Requirements by NYC DOB

1. Boiler room doors must be fire rated and self closing. They must swing out from boiler- room. Not required for sealed combustion boilers.

2. A labeled emergency switch must be installed at each boiler room door. For open basements, switch at stairs is permitted.

3. Boiler room ceiling and walls must be enclosed. The inspector may approve a boiler replacement with small openings and write an ECB violation to the owner. Larger openings will result in first test failure.

4. Open basements must have fire rated material over boiler a minimum of 8' around.

5. Must have perforated DOB plans and boiler manuals on site at t time of inspection.

6. Plans must show boiler make, model & heat input; boiler room door swing & emergency switch; Fresh air location and size; chimney location material & size

7. Clean outs required at base of chimney.

8. Chimney or gas vent must terminate 2' above parapet wall and 10' away from higher walls.

9. Direct vent boilers may horizontally vent 7' above private sidewalks & driveways, 4' below operable windows, 4' to the side of operable windows, 3' above forced air intakes within 10', 3' above grade, 1' above doors, and 3' from inside corners of buildings. They may not horizontally vent over a public sidewalk (4' buffer required). Maximum of 350,000 btuh heat input for devices venting within a 10' radius. Venting into alleyways, small courts, under overhangs & terraces, or heat input over 350,000 btuh will be handled on a case by case basis. Any heat input is permitted at roof line or top of highest floor.

10. Fresh air intake must be directly from outdoors. Ducted combustion air supply must have a fire damper or have fire proof covering to outdoors. Direct vented devices are exempt.

11. Motorized fresh air dampers must have an external interlock switch with all boilers. 

12: Mechanical fresh air supply must have a flow switch and be interlocked with all combustion devices.

13. Gas only boilers with heat input under 2 million btuh must have a chimney cap.

14. Must insulate all new heating and domestic hot water piping in the boiler room.

15. Floor drain or indirect waste pipe required for relief valve discharge, boiler drains, backflow discharge, etc.

16. Boilers must rest on concrete base, filled concrete blocks or brick base.

17. Must have isolation valves on heating piping lines for all boilers.

18. Must have two low water cutoffs for every steam boiler with heat input 350,000 btuh and greater. One must be a manual reset type. One must be a mechanical type.

19. Must have cleanout plugs on steam pressure control piping

20. No band iron for straps, must have hangers or rods for heating lines or flues.

21. Blow down piping on domestic water relief lines must be copper or brass.

22. Steam systems must have a Hartford loop.

23. Cold water feeds must be piped into the return piping minimum 2' from boiler..

24. All natural draft gas fired boilers with heat input over 350,000 btuh input going into a common chimney must have spill switches interlocked in series,

25. All gas fired boilers with barometric dampers must swing both ways and spill switched mounted on the bottom of the damper.

26. Dual fuel gas/oil fired devices must have the spill switch on top of the barometric damper.

27. All natural draft boilers in individual dwelling units must have CO/smoke detector wired in series to shut down boilers if activated.

28. All boilers with C.D.R. controls and low draft switches must be wired and working.

29. No chimney cap on oil fired devices.

30. Oil tanks must be removed or legally abandoned.

31. Oil fired flue must have cleanouts every 15'

32. Inside oil tanks 550 and above must have shut off valve at tank and anti-syphon valve after shut off valve.

33. Must have fire rated ceiling over inside oil tank a minimum of 3' over oil tank.

34. No compression fittings on oil piping

35. Oil pump sets for #2 & # 4 must be intermittent operation.

36. Oil fired burners firing 3 gph must have a DAR kit

Boiler installation basics 6/8/09

Boiler Maintenance

Boiler maintenance

Maintenance is necessarily to prevent failure and breakdowns as well as to prolong the life of your boiler and associated equipment. It is the owner's responsibility to review the owners manual upon completion of the boiler installation and ensure that the boiler is properly maintained. 

Boiler maintenance can be done monthly and annually. It must be done by a heating technician and professional.

Steam gas fired boilers: 
Monthly maintenance:

  • flushing low water cutoffs (not neccesary for probe type low water cutoffs)
  • checking low water cut offs operation
  • spill switch operation check up
  • draining boiler low points
  • check water quality (litmus paper test)
  • check water level sight glass for proper water level and cleanliness of the water
  • check for wet spots around boiler 
  • test boiler sump pump (if present)

Annual maintenance

  • same as above
  • perform combustion test
  • clean steam system
  • clean water level sight glass and replace rubber washers.
  • inspect air side of the boiler
  • clean float type low water cut off
  • open, inspect, clean all control piping at the boiler if necessary, including pigtails 
  • inspect burners
  • blow down boiler under a pressure
  • check all electric connections
  • run system through full cycle and observe boiler operation, pressure controls, and settings
  • test pressure relief valve
  • check base of the chimney and the chimney